Maple syrup: Tips for tapping into nature’s sweetest treat

Many years ago, my daughter came home from school and excitedly told me of her class field trip into the “sugar bush” to gather sap and make maple syrup. A few days later, with some prodding from my daughter, we launched our own maple syrup enterprise.
Each year for the next several years, my family and I enjoyed this rewarding experience while stocking up on a few gallons of the sweet, golden liquid.
While I no longer have the time to gather and boil maple sap, I know of several friends who still pursue this late winter, early spring.
The sugar maple season gets underway in late February or early March and may run for four weeks or more. The best flow of sap will occur when nights are cold (below freezing) and the days are beginning to warm into the upper 30s and 40s. The flow of sap will usually stop if the temperature goes above 50 degrees.
The gathering of maple sap dates back to the American Indians who were tapping maple trees long before the settlers arrived.
While it is somewhat time consuming, making your own maple syrup is not a costly venture and it can be done with a minimum amount of equipment. Part of the fun in the whole process is trying to gather what you need right at home. Besides being educational and fulfilling, it’s also a great way for the family to share the outdoors together as winter begins to loosen its grip on the countryside.
However, there are a few basic facts you need to know before heading into the bush.
First, you must tap the right tree, and that, of course, must be a maple tree. If you’re not sure how to identify a maple tree in the winter – head to the library or the Internet or find a friend who can direct you to the correct trees.
Although any maple tree will do, since they all yield a sugary sap, a sugar maple is best. A sugar maple will produce sap with six percent sugar content, the highest of all the maples. It is also wise to tap trees of at least a foot across or larger. Tapping of the trees will not harm them and, in fact, the same trees have been used for many years in commercial endeavors.
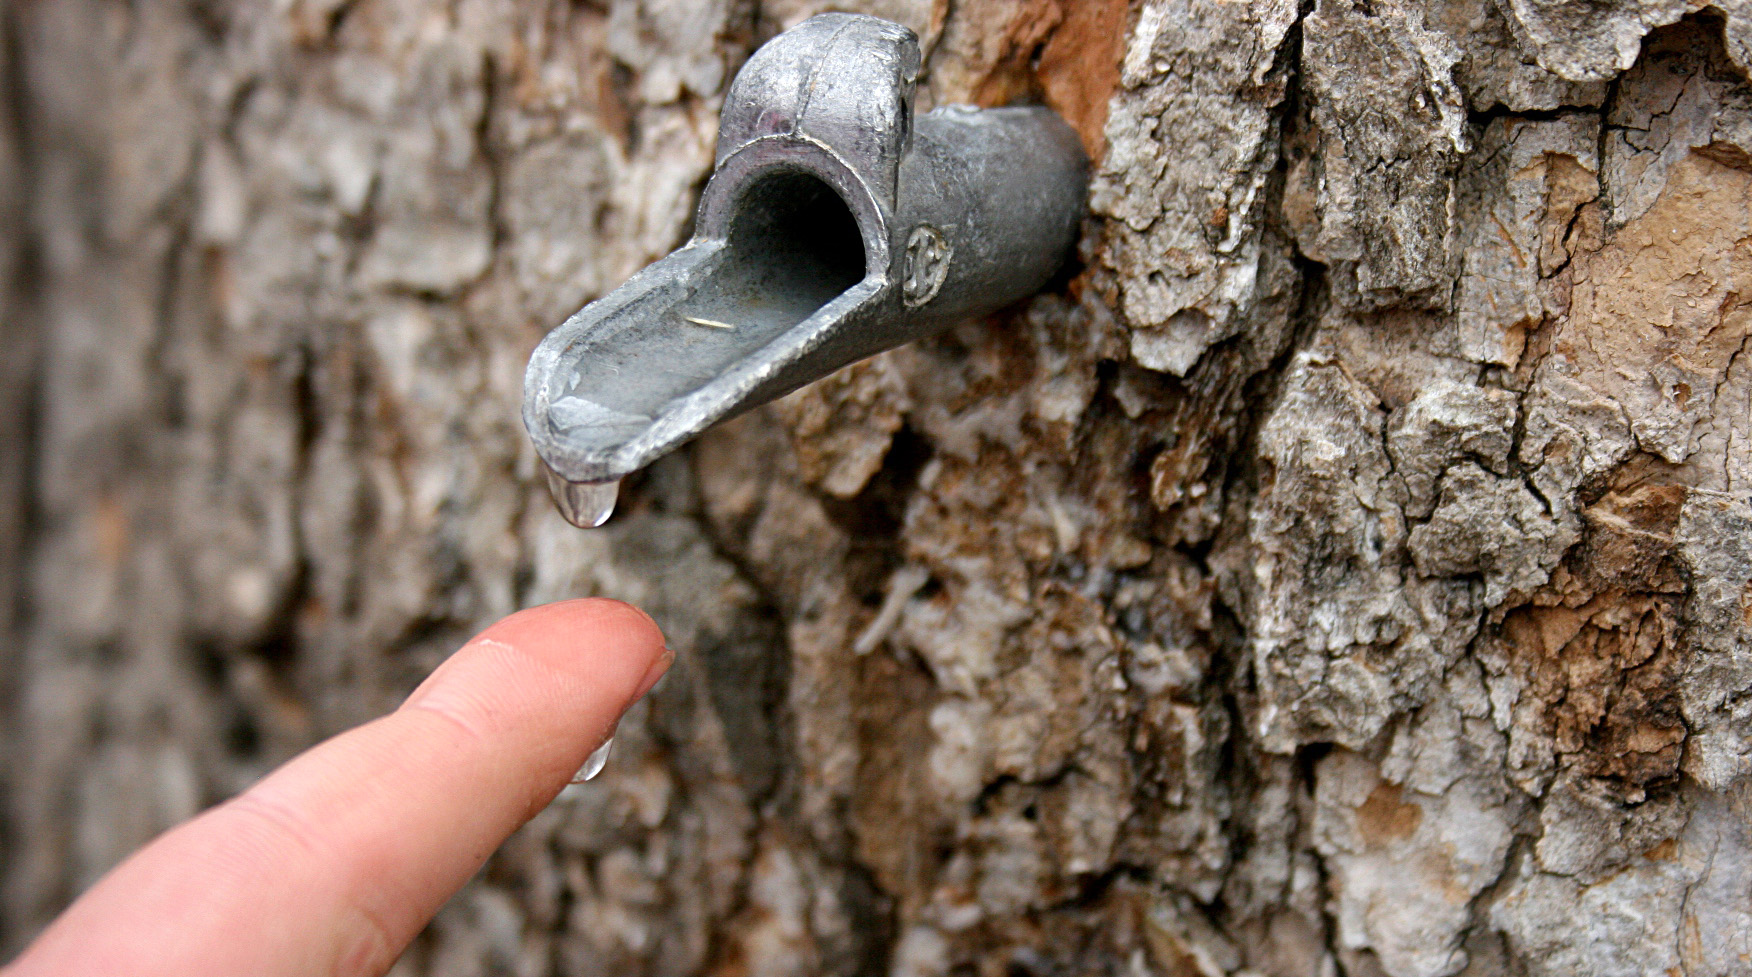
To begin your sugar sojourn, you will need a brace and bit. The size drill bit you use to tap the trees depends on what you use for a spout. Tubular material, either plastic or metal, in lengths of about four inches will do nicely. I used an old aluminum TV antenna cut into the correct lengths. Probably the most economical and practical collection container is a plastic one-gallon milk jug. The handle provides a convenient place to tie the container to the tree just below the protruding spout. The small opening at the top of the container prevents any significant amount of rain or debris from mixing with the sap.
About 2-inch deep holes should be drilled about waist high and at a slight upward angle to facilitate the flow of sap down the spout. You can put a couple of receptacles on a single large tree.
Push the spout tightly into the hole and the sap will begin flowing immediately on a warm day. On good days, you may have to empty your containers more than once — but before you get too excited about potential huge volumes of syrup, you should know that it takes 40 to 50 gallons of sap to make one gallon of pure maple syrup. In order to get 20 gallons of sap in one day, you will probably have to tap at least 10 trees.
The final phase of the process is the boiling down of the sap.
The container you choose to boil the sap in will depend on how much you intend to collect and boil each day. This process is best accomplished on an outside open fire, not in your house. You will be boiling off gallons of water and creating lots of steam which may cause damage to drywall.
Boil the sap down until it becomes a sweet watery liquid, then strain and dump it into a large pan. At this point it is best to move the entire operation into the house over the kitchen stove where you have greater control over the final moments of the boiling process.
Believe me, after all this time and effort you don’t want to blow the operation in the last few minutes. Be careful not to let the sap boil over and burn.
As the sap begins to thicken and become a deeper brown, be very watchful. Do not allow it to boil over and become frothy. Use a lower temperature setting.
It is syrup when it begins to form a thin sticky film on the spoon. While the syrup is still warm, strain it through a couple of layers of cheesecloth and into a suitable container.
Congratulations, you have now extracted some of nature’s finest candy. If you can’t wait for breakfast pancakes in the morning, try pouring some over ice cream – you won’t be disappointed!